Benjamin Hebbert: A Broken Cremonese Violin in Wiltshire
Ben Hebbert finds a historical gem that gives an excellent indication of the worth of Cremonese violins during the 18th century.
Ben Hebbert finds a historical gem that gives an excellent indication of the worth of Cremonese violins during the 18th century.
This article by Benjamin Hebbert offers a unique insight into the history of the violin trade, setting it within an interesting context, the parallel invention of traditions that may seem unrelated. In doing so, he brings a unique insight into the rapid appreciation of both the great violin makers’ art and the simultaneous appreciation of its value.
It is meticulously researched, clearly presented, and an entertaining read.

Wolf tones are hyper-resonances that often occur with cellos. On some instruments they present no problem, but on others they make certain pitches difficult to play well. They typically occur in the area of Eb-F# on the G string (as well as the same pitches higher on the C string). If you are looking for a cello to buy or rent that has wolfs on the D or A string, just move on, this is not worth it. This is a sign of a poorly set up instrument.
With most wolf tones, it is possible to treat the wolf such that it is quite manageable. It is crucial to make sure that the setup is optimal first. If this is so, then there is one aspect of the setup to experiment with first that is not costly and can be effective, and that is the string afterlength. Typically the afterlength (the measure of the string from the bridge to where it is stopped at the end- usually the tuner) should be 1/6th the length of the sounding string length from the edge of the nut to the edge of the bridge. If the afterlength is more than that, it can make a wolf worse, if it is a bit shorter, that can make it less troublesome. If the length is “correct,” the bowed C string afterlength should sound approximately an octave above the open G string, so it you slightly lengthen the tailgut until it sounds F# on the C string afterlength, that can help.
If the wolf remains troublesome, the most common sort of wolf eliminator fits onto the string between the bridge and the tailpiece. In using these, first try it on the C string and tune it to the pitch a 5th above your wolf tone. You tune it by bowing the string between the bridge and the wolf eliminator. If that does not work, then try a 4th. If that does not work, try the note itself. The further away from the bridge you get, the fewer overtones you kill, which is why it is better on the C than the G. (There are 3 octaves of pitches on the other side of the bridge, BTW). If this is not effective enough, then try the G string.
Many people find the new Krentz eliminator much more effective and less problematic for the sound. Some people have reported that it can actually improve the sound of the cello.
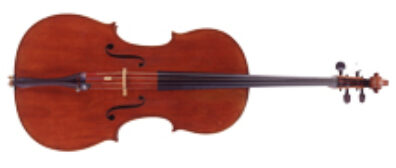
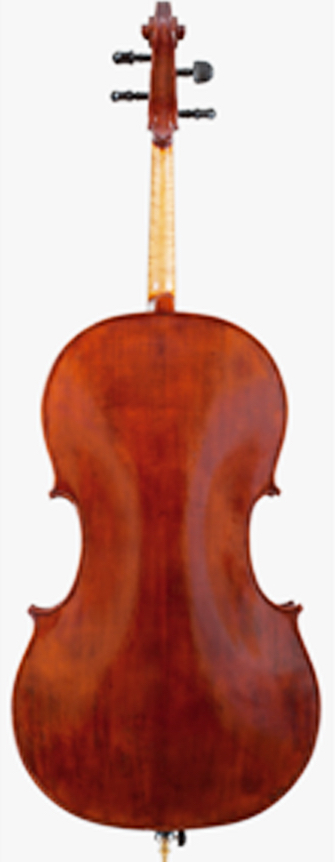
Poplar and willow are the best wood for cello backs, in my opinion. Many people feel that the ex-Nelsova Strad is the best Strad cello; it is willow-backed, and Lynn Harrell’s Strad was poplar. Of all the Strads I have been fortunate to play (ex-Feuermann, ex-Greenhouse, ex-Davidoff, ex-Harrell, ex-Nelsova, ex-Saidenberg), I liked the Saidenberg (that is actually a composite instrument) the best.
The Testores, the Brothers Amati, and many other classic Italians made poplar- and willow-backed instruments. They are the lightest of the classic hardwood tonewoods. Two of my cellos have one piece, slab cut poplar backs, another two have two-piece poplar backs.
Sometimes you may see a top or back of more than 2 pieces, and this is because the wood has exceptional tonal quality and the maker didn’t want to waste any of it. I have seen 4 piece tops on some wonderful old Italian instruments.
https://tarisio.com/cozio-archive/property/?ID=40282
http://The ex-Feuermann/ Parisot/ De Munck Stradivari
http://stringsmagazine.com/walk-on-the-wild-side/
https://tarisio.com/cozio-archive/property/?ID=40277
http://blog.feinviolins.com/2012/02/by-stefan-aune-famous-countess-of.html
David Soyer and Joel Krosnick both had willow- or poplar-backed instruments by Andreas Guarneri and Joseph filius Andreas Guarneri respectively. One certainly cannot say they are not beautiful! Poplar and willow are the lightest of the classic hardwood tonewoods, and sound like a much older instrument when new (in my experience) as it seems more free to vibrate than maple, especially at lower frequencies. I have never heard poplar described as subdued, but it is more like dark, rich, responsive, and loud.
https://tarisio.com/cozio-archive/property/?ID=43783
https://tarisio.com/cozio-archive/property/?ID=40380
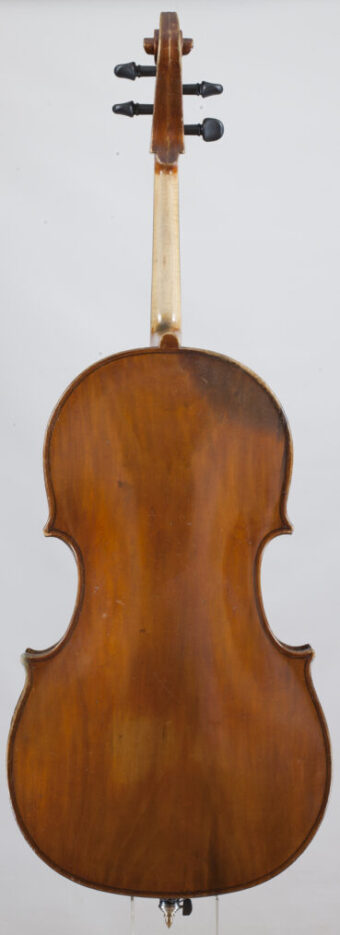
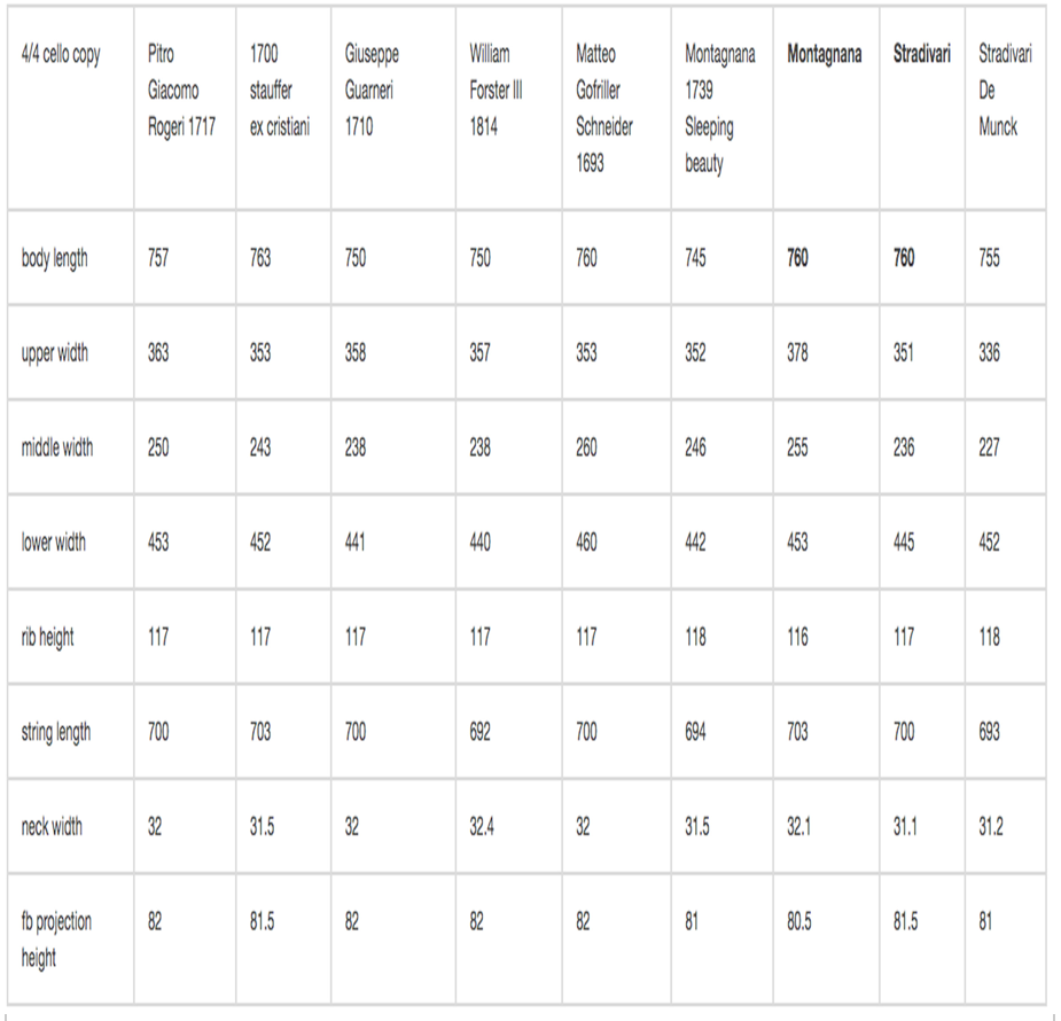
Some cello measurements

building a cello
a balsa wood cello
https://www.hamstringsmusic.com/projects
James McKean
an historic cello by the inventor of the arpegionne
https://yalealumnimagazine.com
/articles/4596-a-cello-ahead-of-its-time
Why we have F-holes
Alternative material soundpost
One of the interesting things I have discovered on cello-related internet sites is that there are a surprising number of people who express an interest in learning to play the cello somewhat later in life. As seems common today, there is a strong DIY trend that seems to accompany this. While many people have experience teaching themselves to play the guitar or keyboard, I tend to discourage this with the cello, as it is simply too easy to do it wrong; not so much in defying “tradition,” but in the very real possibility of long-term injury. Playing the cello is simple, in that there are some very basic principles that are at work to make the cello sing. But those “simple” tasks involve a lot of repetitive motions that even done well can produce nagging health problems. For this reason, and because it is possible to make far faster progress with help, I encourage people to find a good teacher.
A local symphony, the music department of a college, university, or music school, etc., are good places to start. You can go to these resources for advice in finding someone in your community. You do not want to study with someone who teaches general strings unless they are a professional cellist, as while there are commonalities with other members of the bowed string family, there are also radical differences, principally as the cello is approached in the opposite manner of the violin and viola. While I have learned an enormous amount from violinists and pianist over the years, I did so as someone who already had a good foundation at the cello. So, I strongly urge that the person someone studies with be a competent professional cellist. The cello has particular requirements that you must get right, and one can only fulfill those with professional guidance.
For many beginners (even adults) Suzuki training is a good way to start, and it offers the social aspect of working with a group at least part of the time.
For the new cellist, acquiring a cello is an important task. As the new cellist has no experience to rely on in order to judge what a decent instrument is, it is important to have a knowledgable person guide this process. I have seen so many people ask about this great deal they saw on eBay/Amazon/the local band/guitar store and think that it must be OK. 99% of the time this is very wrong. For the new cellist, renting from a reliable shop that specializes in violin family instruments is the best option.
The best thing you can do is to go to shops that are well regarded by string players and develop a relationship with the people there. A good shop of this sort may be run by a luthier (not the kind that works on guitars), or violin maker. This kind of expertise is much more likely to yield a good outcome. Take a colleague or teacher with you to try instruments, so that you can hear what they sound like from the listener’s perspective. If you are a more experienced player, try instruments that are out of your price range to get a better idea of what qualities you might want to look for, and to give you a better perspective of the market and pricing. By getting to know the staff, they can get an idea of what you are looking for and keep an eye out on your behalf. On the other hand, don’t allow anyone to convince you to buy a cello that you have reservations about. Those reservations will turn into resentments over time.
For the new cellist, I would advise the following: successful progress is dependent on the cello being well set up to play. This requires a professional luthier’s attention, no matter if the cello is a factory made one, or by one of the great masters. This is particularly important for the new player. Considerations in getting a first cello begin with the fact that it is better to rent in the beginning for a number of reasons. If there is any uncertainty about how serious the new player’s interest is, renting minimizes the investment if the player becomes discouraged or loses interest. If the new player takes to it well, then renting makes it easier to move on to a better instrument over time. Again, you should only rent from a shop that deals exclusively with violin family instruments and has a professional luthier on staff. Not a “music store,” “guitar center” or online source, etc. Many shops offer a rent to own arrangement, but I would not advise buying your first cello under any circumstance. Upgrade the rental as the new player progresses in their capacity and interest in playing. At that point, the rent to own option becomes more of a consideration. If there are no such shops available near you, there are some large shops that may well rent and ship instruments like Shar Products and Johnson Strings. Further considerations:
“trade” instruments are not hand made by a luthier who markets the instrument themselves. Such instruments are most frequently made in factories in China or eastern Europe. They are often sold in bulk and given names of makers who don’t exist or some kind of “brand” name. These names are meaningless. They will never be an investment, the way an instrument by a fine and well-regarded maker can be, they will at best maintain their value as a tool of trade, if they are well set up to play and well maintained.
There are fine shops that will import a bunch of these and fix the problems that they often have, bad fingerboards, problematic necks, bad bridges, posts, tailpieces, pegs, strings and endpins, and they will sometimes do some regraduation of the wood, particularly the ribs and tops. As the material used in the better ones can be quite good, as are the basic execution of the models, the factories survive by basically selling them under-finished, and the local shop adds value by finishing them properly. There are shops that are known for selling really well setup instruments of this type that are very decent cellos, but most of the online sellers are selling problem instruments. Buying such a bulk instrument yourself pretty much guarantees that you will end up spending at least as much as the purchase price again in order to make the instrument reliably playable. Let someone else take that risk for you.
There are a number of things that can make a cheap cello’s intonation unreliable that you must be aware of, all involving the neck/fingerboard. If the fingerboard is not real ebony (common on many cheap instruments), the neck can warp or flex, which literally makes the place where the note should be move around as you play. An improperly set neck, or a neck whose wood is too “green” can also do this. The neck could also be warped because of improper maintenance. This is addressed be replacing the fake ebony fingerboard with a proper one, and sometimes inserting a carbon fiber rod into the neck.
As to shopping for a fine cello, you need to get to know makers and instrument dealers in your area, or even go on a “road trip” to visit major dealers’ shops. This can be fun and very informative. Developing a relationship with such folk makes it much more likely to find a fine cello, as they will learn your needs and preferences as you develop that relationship, so that when you decide it is time to seek a fine instrument, they will understand what you are looking for and can exploit their network of contacts to find something for you. As cellos can be an expensive purchase, there are occasions where one might need help financing a purchase. Some musicians’ unions have credit unions where a loan might be available, but this I sadly less common these days. Some people have had success getting personal loans from a bank. I played on modern instruments for my entire career that were made for me, and I strongly urge all serious cellists to consider this, as we live in a time of great cello makers. Below is a link to an organization I have heard can be of help in purchasing an instrument.
http://www.maestrofoundation.org/instrument-lending-program/
One other consideration that all cellists must be aware of is that accidents happen which can be cause for significant costs to repair. Many rental programs provide insurance as part of the rental, and this is something that must be clearly established before renting. Once you purchase an instrument, you need for it to be insured. If you are getting a loan for the purchase, this is likely required, and it would be foolish not to do so. For the young student living with their parents or in college/grad school, the parents can have the instrument included on a homeowner’s policy or renter’s insurance, usually subject to some deductible. I understand that a number of professionals are now using this form of insurance due to the fact that many instrument insurance policies no longer are “all risk,” whereas homeowners/renters policies are “all risk.” This kind of policy on a professional instrument would likely require a “rider” on your homeowners/renters policy for an additional premium. I have heard that this is often cheaper than a specific instrument policy.
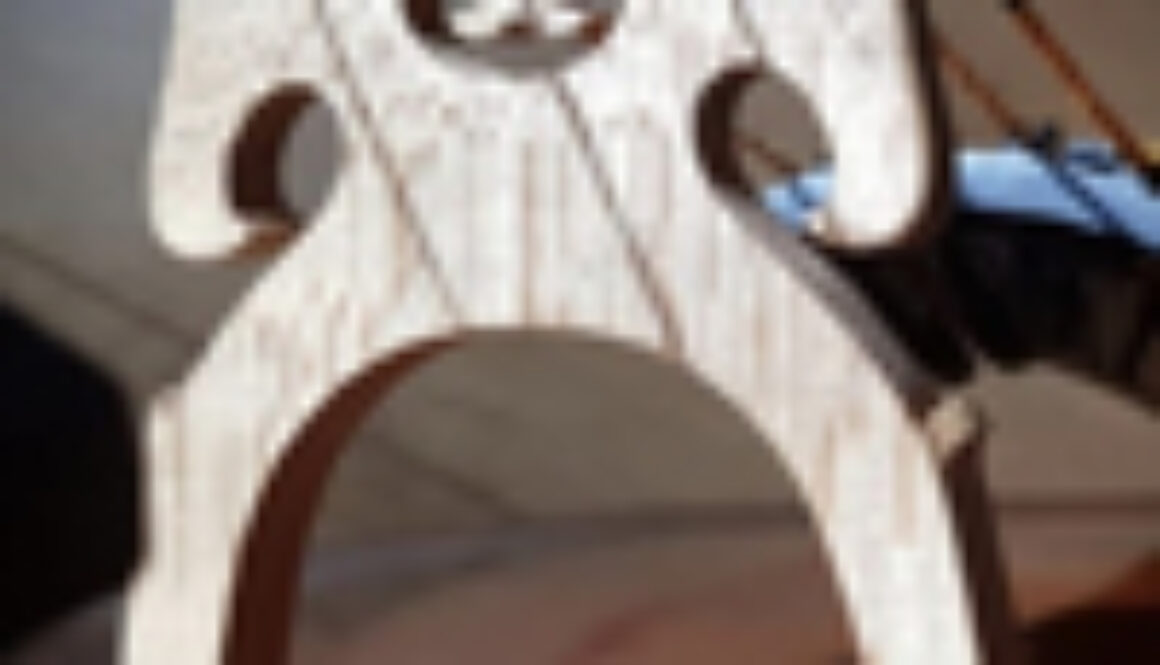
Bridge blanks are a practical necessity, as the rote (machine) work required to make a mass produced product (a blank) does not require the refined skills of the particular sort that actually carving a blank into a bridge does. Beyond that, there are issues as to the “tightness” of the wood grain and its degree of dryness that have an impact on sound quality. They also impact how difficult it is to work with the bridge, because the dryer, older blanks are harder to work on, but produce the best results in terms of sound and responsiveness. Hard, dense wood transmits sound faster, (hence the desire for tight-grained, old bridge blanks). A higher “arch” (longer “legs”) is achieved by cutting the top of the feet of the blank down from the top of the feet (and, to a degree, carving the arch higher), and the bottom of the feet must be fit to the top of the instrument. Longer “legs” means less wood, which translates into faster response, which is the main reason that Belgian bridges have become more popular; they have longer “legs” and less wood on top than the Aubert blanks. The thickness of the top section is also important in maximizing the transmission of sound, too thick, less response, too thin, likely to warp or break. It takes years of experience to get it right consistently, which is why a good bridge usually is quite expensive, but well worth it.
You might see advice on the internet that suggests you just go buy a blank bridge and cut it yourself. This is profoundly mistaken. It takes years of training and practice to master the skills to cut a good bridge, and even to recognize a good bridge blank. As the bridge is a vital element in having a responsive instrument, this is not something to compromise on. Do not do this. One look at the articles on bridges linked later in this article and it should quickly become obvious why this is something best left in the hands of an experienced professional.
The variability of carving one sees in bridges is due to differing concepts as to how to best achieve a balance of these elements for a particular instrument, although most luthiers do have a general, recognizable design philosophy. Some people think that the Belgian bridges are better for darker instruments, but I am inclined to think it is more a matter of the physics of the volume of wood more than the blank type. I have seen many white, thick, broad-grained, short-legged bridges made by people who are not well-trained in places that are not near an important luthier, which is why I cringe when I read someone say that they will make a bridge for $90US. If you don’t have good material and you cut corners with sub-optimal (but faster) proportions, you can have a lousy, cheap bridge. If you save your money and see a true artist, you will be glad of the result. This is one of the reasons why a cheap factory-type instrument can sound quite decent or horrible. If you ever have the chance to compare a bunch of blanks, try dropping them from a short distance (on a horizontal plane) onto a hard surface and compare the sound. A dry (darker) tighter-grained blank “rings” more than a soft, white one.
Janos Starker experimented a lot with different bridge designs, as I recall. There was, at one point, a “Starker” blank with an “S” instead of a heart in the middle. He tried bridges where the feet/legs had a conical-shaped hollow at one point. Fast response and not full-spectrum is what I recall of that experiment.
https://www.aitchisoncellos.com/cello-bridge-design/
https://stacks.stanford.edu/file/druid:gh900xs0490/CAS_gh900xs0490.pdf
Bridges warp due to the uncorrected movement of the bridge caused by significant changing of pitch of the instrument, as the friction of the strings pulls it in the direction that you are moving the pitch. You need to ask your luthier how to adjust for this, it is basic maintenance that one can learn to do and must be done periodically, particularly when the weather changes requiring one to significantly retune, or when changing/breaking in new strings. He/she will have to do this when they put a new bridge on, so this is a perfect opportunity for you to learn this important skill. If you do not learn to do this or have it done for you, you will warping bridges forever. This is a basic and important skill that every cellist needs to know and none are taught. I have bridges that I have kept for decades (different heights for different seasons), and none of them has warped.
https://www.aitchisoncellos.com/cello-bridge-care/
There is lots of very bad advice out there on the internet about how to fix a warped bridge. Principally this involves steam or hot water to soften the bridge. As the best bridge is dense and dry wood, it should be obvious that such treatments are bad for sound, but they also weaken the structure of the wood, making it more vulnerable to further warping. So, if you want to have a bad sounding bridge that warps regularly, follow this advice. If, however, you want to take good care of your instrument, and enjoy its maximum playing potential, visit your luthier and learn to monitor and adjust your bridge. Or have them do it for you. In the event your bridge does warp a bit, they can use dry heat to straighten it if it isn’t too badly deformed.
A mute will not cause the bridge to warp or otherwise damage it. I hate the rubber practice mutes, personally, in my experience they distort the tuning of the cello, which is much worse for your bridge than anything. Never leave the mute on the bridge when you are not using it or when it is in the case, that will cause trouble.
The inner hash marks on the F holes should align with the center of the side of the bridge feet, and the feet should be equidistant from the F holes. The side of the bridge closer to the tailpiece should be perpendicular to the top (the side closer to the fingerboard should look like it is leaning slightly back towards the tailpiece when viewed from the side). This is because the back of the bridge is uncut and flat, whereas the front is where the bridge is thinned to the proper shape, wider towards the feet, narrower towards the top. The bass leg of the bridge (that which is under the C string) should be centered over the bassbar, and the feet should be cut and placed so that they are located equidistantly from the F-holes.
The height of the A string above the end of the fingerboard should be 4.5-5.5mm, and the C string should be 7.5-8.5mm. With season changes, this can vary significantly. When we are go from the dry, cold, heating season, where the wood of the instrument is dry and at risk of cracking, to the humid, hot season, where the instrument swells with the increase in humidity, the body swells, the bridge goes up, making the strings higher over the fingerboard. The reverse happens as we go back to the dryer, colder season. The best way to deal with this often is to have 2 bridges, one for summer, one for winter. You could save some money in the short term just having your bridge reshaped in the summer, but it will probably be too low the following fall.
We often experience the pegs becoming difficult to turn in humid summer weather, and have them slip when the weather gets cold and dry. This is because the pegbox swells with the higher humidity and shrinks in the cold, dry weather.
From David Burgess:
“Let me go over the basics once again. Wood is an organic material which exchanges moisture with the surrounding air. It swells and contracts depending on its moisture content, and it’s moisture level depends directly on the moisture in the surrounding air. This change in shape and size puts tremendous stress on the instrument. When it gets smaller, parts of the instrument like the top are under tension, the perfect condition for the formation of cracks and failure of the joints and seams. When it gets larger, joints and seams can also fail, and at high moisture levels, the resistance of wood to bending and to permanent deformation goes way down. Heat and moisture were used by the maker to bend the ribs on your instrument, so you can understand how excessive moisture can result in permanent distortion of the top and a permanent sagging of the neck height. So the dimensions and strength of the wood change with moisture content, but did you know that the weight of the wood also changes significantly? No wonder the sound of instruments changes with moisture content. These factors, weight, dimensions and strength are the very factors that instrument makers manipulate to control how their instruments sound in the first place!” I highly recommend the calibrated humidistats he makes available,
http://www.burgessviolins.com/humidity.html
http://www.thestrad.com/ask-the-experts-protecting-your-instrument-in-hot-and-humid-temperatures/
from Nashville violins:
“Most violin-family instruments have pegs that depend on friction. There is a gradual taper to both the peg and peghole that needs to match precisely. This allows the peg to hold (due to friction), but we also need it to be able to turn. If your instrument has fine tuners, you might not need to turn the pegs very often, but they do need to turn sometimes. The major reason for pegs not being able to hold on can be attributed to cold weather and lack of humidity. Most pegs are made out of very hard, dense ebony wood that isn’t affected much by humidity. The wood surrounding the pegs, however, is maple, and although maple is considered a hardwood, it is much softer and more prone to expansion and shrinking with changes in humidity. As the maple loses humidity in the winter, it gradually shrinks making the pegholes slightly larger until “POP” the peg can’t hold on anymore!”
When tuning using pegs, it helps to lower the pitch first, as this releases the friction between the peg and the peghole, as well as makes the string move more easily over the bridge and nut grooves, making the pegs easier to turn. When tuning the pitch up to the desired pitch, a gentle pressure on the peg towards the pegbox will help it stay in place.
Quite a few cellists are now using geared pegs, which offer a much more stable condition of the pegs with changes of weather, and can eliminate the need for fine tuners, as they are geared to make very fine adjustments. I like them very much, and find that they can help limit the sources of buzzing that can occur related to fine tuners. Like friction pegs, it is a good idea to tune down the string a bit first when tuning, as it relaxes the friction on the bridge and nut grooves somewhat. I prefer PegHeds and Wittner pegs to Knilling, as there have been some reports of failure with the latter. The only disadvantage with the geared pegs is that it takes longer to change strings due to the lower turning ratio that makes it possible for easier fine tuning.

The traditional explanation of the hair on the bow has been that it has a rough surface that is like little hairs. Rosin makes these separate and stand up, and gives them a sticky quality. They can then grab the string like millions of fingers playing pizzicato. While this is a nice metaphorical explanation, this model has been revised, as can be seen here:
http://knutsacoustics.com/files/rocaboy-bow-hair.pdf
As the bow moves, there is a pull and slip (called a Helmholtz motion) that allows the string to vibrate back and forth, like this:
https://www.youtube.com/embed/3HRwn_3PDFE
Too much rosin inhibits the slip, too little inhibits the pull. Neither sounds good. As a general rule, a little bit of rosin applied regularly is all you need. If you are getting a bunch built up on your strings or the top of your instrument, you are probably using too much.
As to tightening the bow, you need enough tension on the hair to grab the string and so that the hair does not touch the stick when you play. Generally speaking, a very flexible stick needs to be tighter than a stiffer bow.
The color of the hair is not a fair gauge of whether it needs rosin, horse hair has different shades. The best way to judge if you need rosin is by how it feels to use the bow. If the sound is whistle-y, does not speak, etc., you need more rosin. If clouds of rosin puff up when you play, it is way too much. As you are learning, just put a few swipes on each time you play and see how it feels. If you get a bunch left on your strings and cello, wipe it off with a soft cloth and skip rosin for a couple of days and see how it feels.
https://shop.warchal.com/blogs/what-s-the-best-way-to-care-for-our-strings
https://shop.warchal.com/blogs/
the-lifespan-of-strings-wear-and-corrosion
Tips on buying a bow
http://stringsmagazine.com/a-guide-to-buying-a-bow/
Go to a bunch of violin shops or bow makers (not “music stores”) and take your cello with you. Try as many bows as you can on your cello and see what works for you. You will learn a great deal from this. Brands are irrelevant, sound and handling are all that matters, what is good for one cellist on one cello does not necessarily transfer to another.
Try to have a colleague go with you to try bows on your cello, as hearing the sound of different bows on your cello as a listener is also important. Look for flaws in the bow by playing long, slow bows, and if you see the bow “jerk” a bit consistently in the same part of the bow, that can indicate a problem. Of course spiccato, sautille, etc. are important to test.
Lots of shops will send out a group of bows on trial, so decide what you want to spend, and contact the big shops that offer this service. Don’t obsess on names, what you need is a bow that works for you and your cello.
There was a great variety of bows during the period 1600 – 1750 (which includes the development of the “modern bow by Francis Xavier Tourte). Most bows from before around 1720s were bows without an adjustment screw. Instead they had a frog which was wedged between the hair and the stick of the bow. (When not wedged correctly, the frog can jump out of its intended position, and this is what lead it to be called frog, since it had the tendency to jump). Such frogs are usually somewhat higher and are well rounded at the end over which the hair runs. Baroque bows come in many sizes: from very long to very short. This has to do with the many different types of bow hold that existed, from almost at the frog to close to a third up the bow, to underhand grip; all of these different bow holds need a different type of bow. Most baroque bows are convex, but some later ones might be slightly convex toward the tip. Underhand bows tend to be longer and have heavier tips than overhand bows. Different types of wood were used: snakewood is most commonly seen nowadays on baroque bows, but ironwood, bloodwood, some late ones in pernambuco, even light woods like beech and larch have been used to make bows from. All of these of course have a serious impact on how a bow functions, and what they can do for you.

Here are four books which tell some fascinating stories that illustrate the changes of the musical (and real) world over the 1st half of the 20th Century and more.



Rudolf Matz was considered by many to be the greatest theorist of the cello of the twentieth century. This book details his life, career, and his teaching philosophy.

“Cellist” is out of print, but very charming, with lots of colorful and entertaining stories if it is in your budget. Piatigorsky was a great cellist and raconteur. The Aronson book is an illuminating tale of the first half of the 20th Century told through Aronson’s experience. There aren’t many cellists around who have direct knowledge of some of the things he experienced (he was in both Nazi death camps and a Nazi work camp), and it is well worth reading. The History of the Violoncello has a lot of information on many cellists of the past. I’m told Aronson hated it because he wasn’t in it. Life is a strange trip, for sure… Rudolf Matz and Lev Aronson worked together on “The Complete Cellist” which is out of print now. It is available, as are the collected papers of many renowned cellists (including Aronson and Matz) at the excellent UNCG archives.
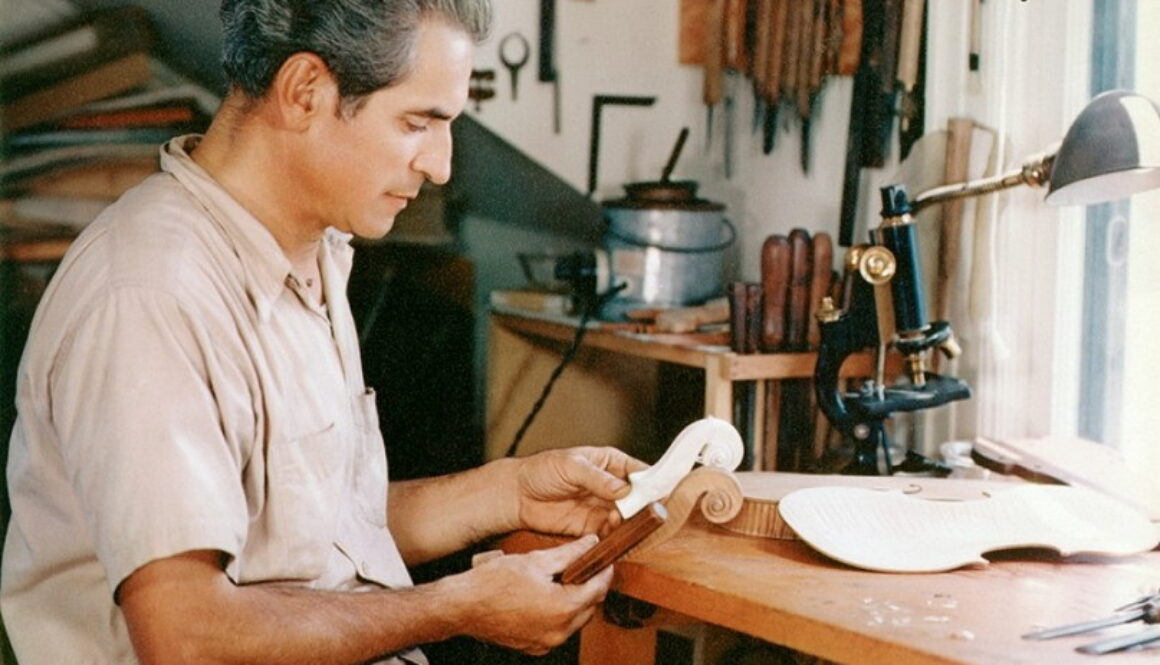
Rembert Wurlitzer, an important member of a family whose influence was profound. Sacconi, D’Attili, Nigogosian, Morel, Français, Arcieri, Bellini, Cauer, Salchow, and more, were trained and nurtured in that shop; most are now gone. Below are links to some interesting stories of some of America’s most influential shops and the people who made them so.
The Rembert Wurlitzer Company, history and some of the renowned people who came from it:
(certain wiki articles seem to need going to a second page. This may be one, as it seems to ask “did you mean this other page?” yet that second page has the same URL but indeed opens the page desired. It’s the internet, go figure…)
https://en.wikipedia.org/wiki/Rembert_Wurlitzer_Co.
https://www.corilon.com/shop/en/info/rembert-wurlitzer-violin.html
https://tarisio.com/cozio-archive/cozio-carteggio/memories-of-dario-dattili/
https://drive.google.com/file/d/1lveqpDqImTWPQ8fmrSgrhaGycVkd9xPk/view?usp=sharing
https://www.nytimes.com/1997/09/30/arts/vahakn-nigogosian-87-builder-of-violins.html
https://www.newyorker.com/magazine/1953/10/24/trustee-in-fiddledale-2
https://hweisshaar.com/about-hans-weisshaar/
https://en.wikipedia.org/wiki/William_Lewis_%26_Son_Co.
https://www.thestrad.com/us-bow-maker-william-salchow-dies-aged-88/5720.article
http://sova.si.edu/record/NMAH.AC.0872
https://www.thestrad.com/lutherie/an-afternoon-with-carlos-arcieri/9220.article
https://en.wikipedia.org/wiki/Ren%C3%A9_A._Morel
https://www.thestrad.com/renowned-american-violin-maker-luiz-bellini-dies-aged-79/4557.article
https://www.youtube.com/channel/UCmEZjsNE6ODzGttJa2xkjWQ
I discovered this fellow, of whom I did not know and for whom Rembert Wurlitzer once worked (there is a glimpse of him in this short film)
American violin maker James Reynold Carlisle: